Defining Assignment Rules
Creating Case Queues
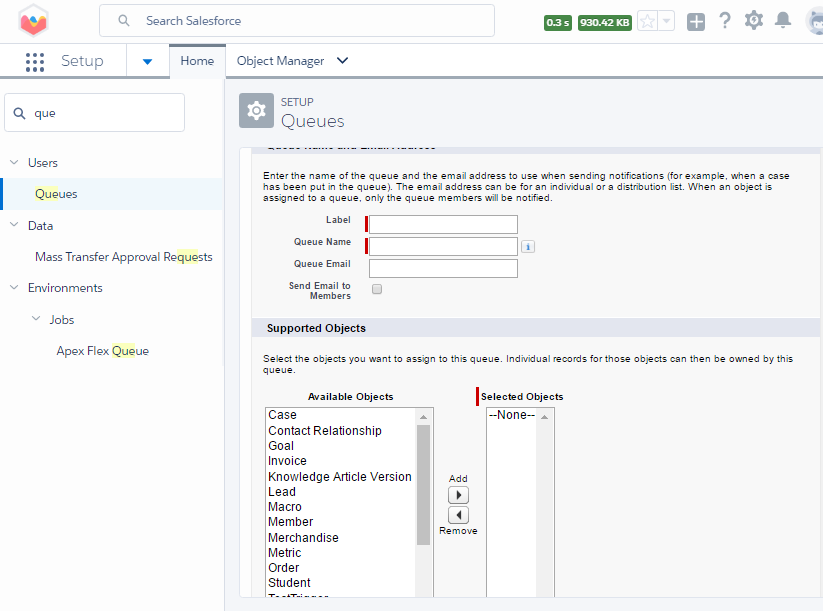
Queues can have any number of queue members. Queue members can take ownership of any case defined in that queue. If your organization allows users to select the case from a pool, create case queues and give the appropriate users membership to that queue.
1. From Setup, enter queues in Quick Find Box and then select Queues.
2. Click New.
3. Give a name for the queue.
4. Enter an email address to which all notification emails will be sent.
5. Select Send email to members assignment to notify the email address in specified queue and all queue members when new cases are placed in the queue.
6. If your organization uses divisions, select the default division for the queue. This determines the division for a case where it is assigned to the queue via the assignment rules or manual change of ownership .
7. Specify which objects can be placed in the queue. Your choices can include cases, leads, or any custom objects.
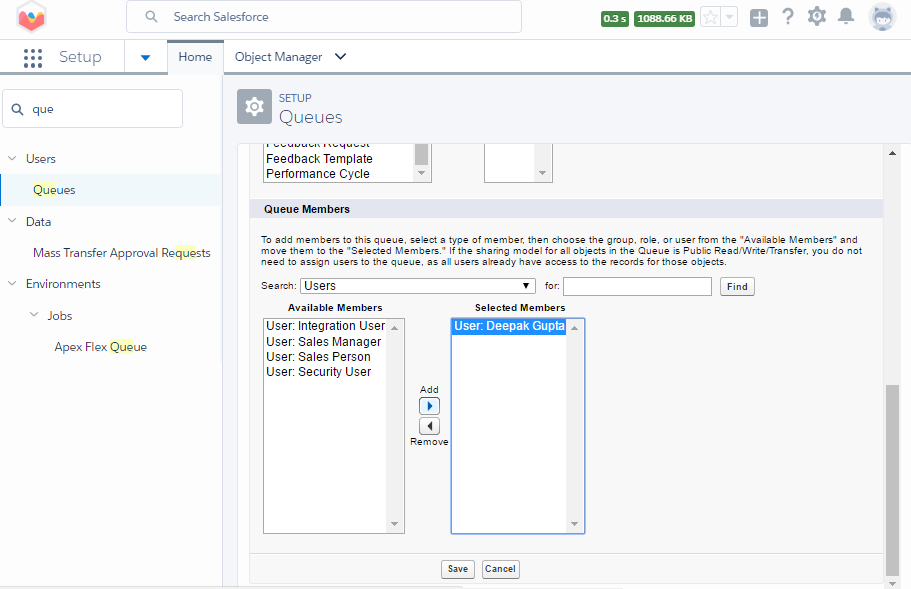
8. Specify which users, roles, public groups, territories, or partner users will be members of the queue. Only members and users of queue above them in the hierarchy of roles can support cases in this queue , unless your organization has set the organization to public read / write / transfer .
9. Click Save.
Choosing a Default Case Owner
Make sure your comments are assigned to a specific support representative, although none of the assignment rules apply,
for chossing of default owner.
The default case owner can be a user or a queue.
1. From Setup, enter support settings in Quick Find Box then select Support Settings.
2. Click Edit.
3. Choose user or queue.
4. Select the user or queue name you want to be the owner of a case if no assignment rules apply.
5. Click Save.
Creating a Case Assignment Rule
1. From Setup, enter case in Quick Find Box then select Case Assignment Rules.
2. Click New.
3. Enter a rule name.
4. Click Save.
5. Click New in the Rule Entries section.
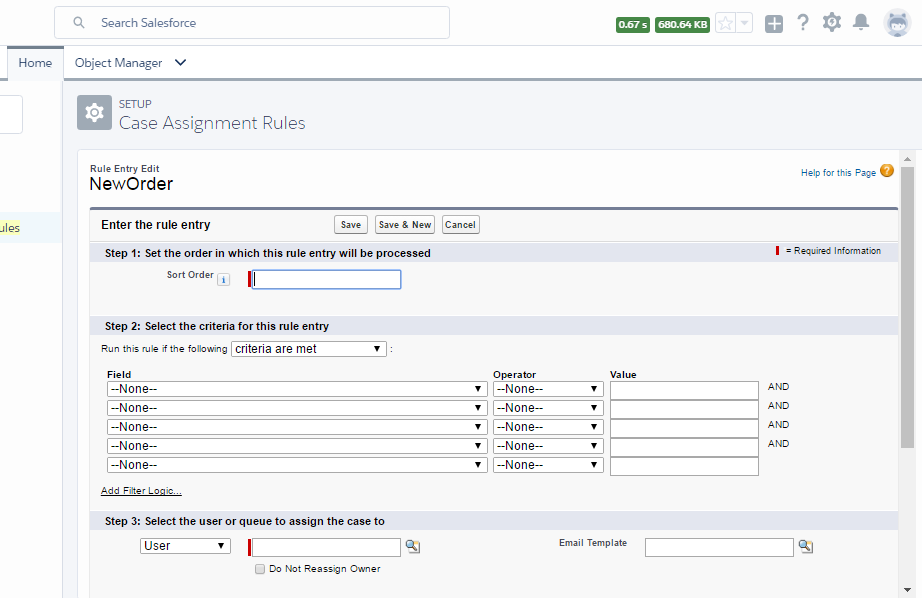
6. Enter an order number to determine which rule entries are evaluated first.
7. Select the conditions that a case must meet to trigger the assignment.
8. Choose a user or queue to assign to any cases that meet the conditions.
9. Select a notification template to use when notifying the new case assignee.
10. Click Save.