Capturing Cases from Your Website
Preparing a Web-to-Case Page
Web-to-Case page can be prepared without having to learn any HTML.
Simply select the fields you want to display on the site , click a button, and send the generated HTML code to your webmaster to post on the site.
1. From Setup, enter web-to-case in the Quick Find box, then select Web-to-Case HTML Generator.
3. Enter the URL address of the page that displays for the user after submitting the form.
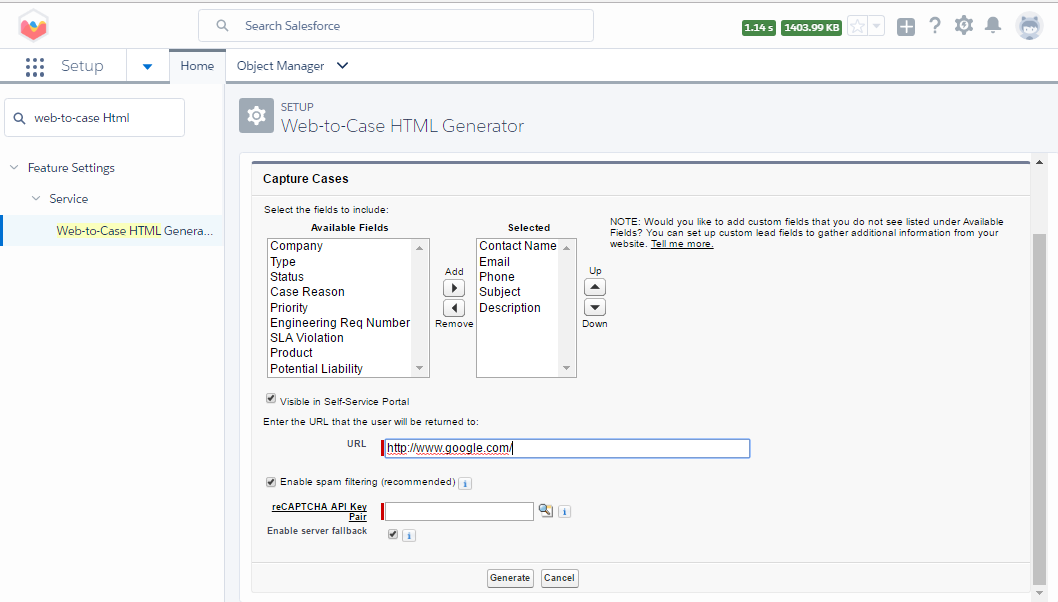
4. Select the case of fields for which you want the data to your Web -to- Case form .
5. Click Generate.
6. Send text generated to your webmaster and ask for the page to be posted on your website.
7. Click Finished.
Enabling Web-to-Case
Enable Web -to- Case for your organization and choose an event of default response model to send to people who submit cases from your website.
This default response model is used only when no automatic response rules apply.
1. From Setup, enter web-to-case in the Quick Find box, then Select Web-to-Case.
2. Click Enable Web-to-Case.
3. Check Case Capture Enabled.
4. Select a default response model used to answer incoming cases when no automatic response rules apply.
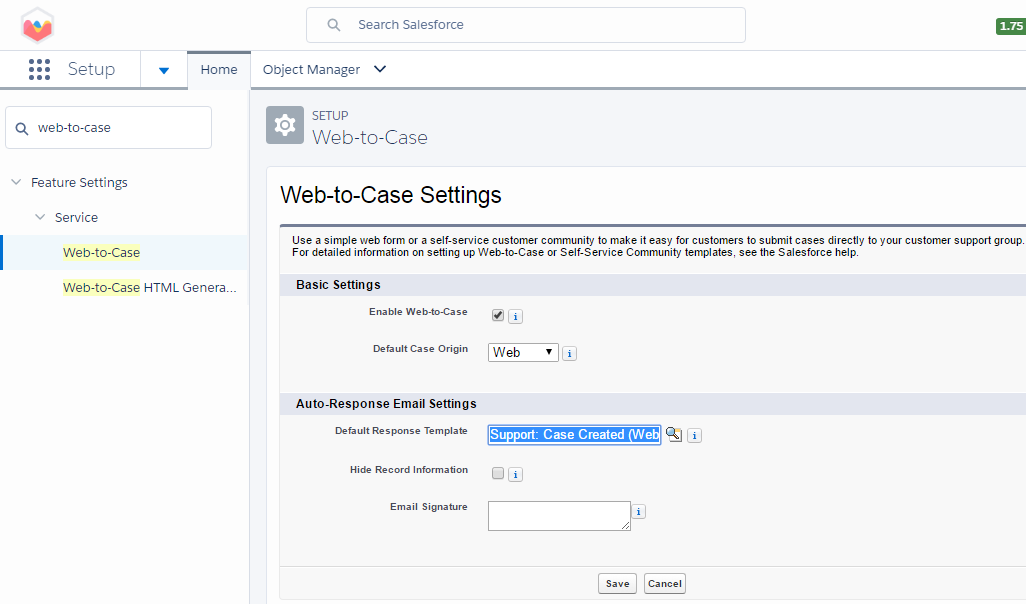
5. Choose a default origin for cases submitted from your website.
6. Click Save.