Solution Manager
Choosing a Solution Manager
Solution managers have the permission to edit,delete and publish the solutions to Self-Service or Customer Portal.
Solution Managers:
• Should be higher reps having advanced knowledge and excellent written communication skills.
• Are responsible for reviewing the solutions and guiding to write good solutions to other reps.
• Are responsible for the associating solutions with right solution categories.
To Make a User a Solution Manager :
1. From Setup, click Manage Users -> Users.
2. Click Edit next to a user’s name.
3. Assign user the Solution Manager Profile.
4. Save
Validation Rules
Creating Validation Rules
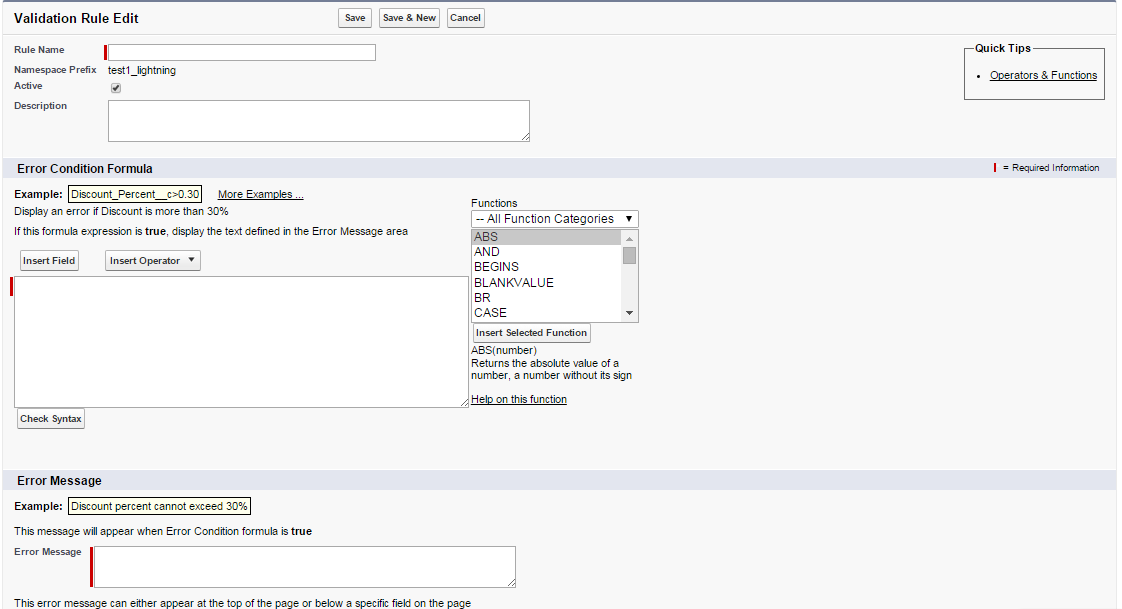
 You can create validation rules to automatically verify that the solutions meet the standards that you specify before users can save them.
A validation rule can contain a formula or expression that evaluates the data in one or more fields and returns a message of True or False.
1. From Setup, click Customize -> Solutions -> Validation Rules.
2. Click New in the Validation Rules related list.
3. Enter the properties of your validation rule.
4. Click Check Syntax to check your formula for errors.
5. Click Save.
Multilingual Solutions
Setting Up Multilingual Solutions
Multilingual solutions can be turned on so that users have the ability to translate solutions into multiple languages. Solution categories can also be translated into the same language used for translating the solutions.Translated solutions inherit the categories of the master solution with which they are associated

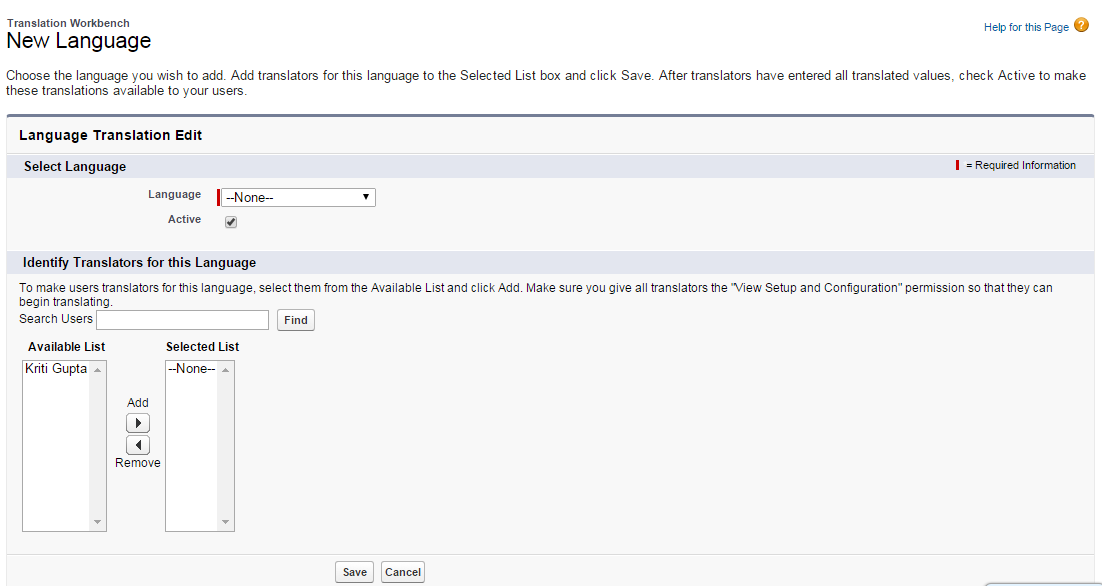
1. To add a language you want to support in the Translation Workbench:
a. From Setup, click Translation Workbench -> Translation Settings.
b. Click Add.
c. Choose a language.
d. Select translators for this language.
e. Click Save.
2. From Setup, click Translation Workbench -> Translate Categories.
3. Select a language to see a list of terms available for translation.
4. Click Edit.
5. Enter translated terms.
6. Click Save.
Enabling Multilingual Solutions
Enable multilingual solutions.
When multilingual solutions are enabled , all existing solutions automatically become master of solutions.
1. From Setup, click Customize -> Solutions -> Solution Settings.
2. Click Edit.
3. Select Enable Multilingual Solutions.
Optionally, to allow customers to view the solution of search results in a specific language or all languages supported via
a drop-down list, select:
a. Enable Multilingual Solution Search in Self-Service Portal
b. Enable Multilingual Solution Search for Public Solutions
4. Click Save.
5. Customize page solution set to include the title of Master Solution , details of the Master solution, and out of the fields of the date and the translated solutions related list:
a. From Setup, click Customize -> Solutions -> Page Layouts.
b. Optionally, you can make solution edit pages easier for users to translate
multilingual solutions by setting the Detail Information section to two columns and placing the Master Solution Title
and Master Solution Details fields alongside each other so that users can effortlessly compare master and translated solutions.
.c Click Save.
6. To allow users to associate translated solutions with master solutions, set the field-level security
settings of the Master Solution lookup field to editable for profiles with “Create” and “Edit” permissions on solutions:
a. From Setup, click Customize -> Solutions -> Fields.
b. Select the Master Solution field.
c. Click Set Field-Level Security.
Field-level security is available in Enterprise, Unlimited, Performance, and Developer Editions only.
d. Select Visible for profiles with “Create” and “Edit” permissions on solutions.
e. Click Save.
7. As a best practice, add a long text area custom field to solutions called Translation Comments,
and include it on solution page layouts so that users can add any comments regarding the translation of a solution.
Public Solutions
Enabling Public Solutions
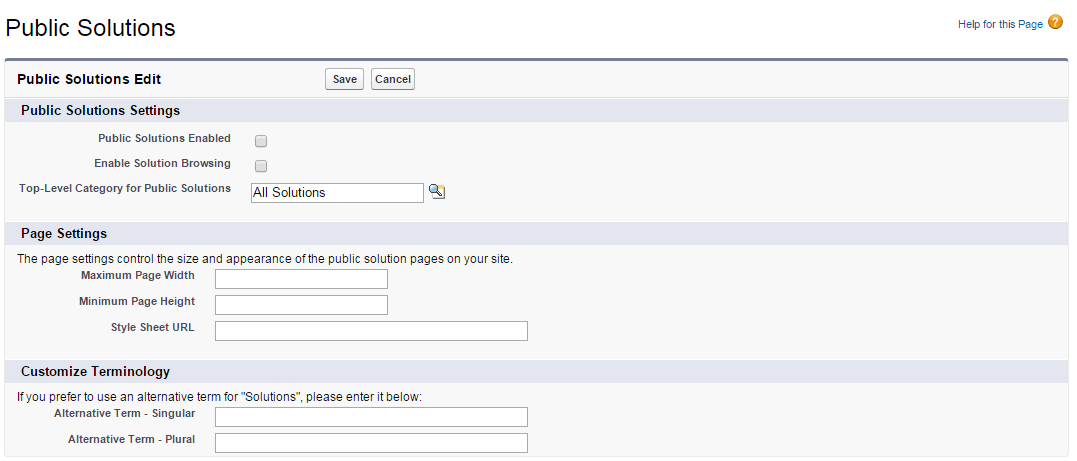
To allow customers to access public solutions via the Web:
1. From Setup, click Customize -> Self-Service -> Public Solutions.
2. Click Edit.
3. Select Public Solutions Enabled.
4. If your organization uses solution categories, select Enable Solution Browsing to allow customers
to browse solutions by category on public solutions.
5. If desired, you can change the appearance of the frame on your website by specifying the Maximum
Page Width and Minimum Page Height.
6. Provide the URL of your CSS file in Style Sheet URL.
7. If desired , change the word or phrase that is used to describe solutions to public solutions using the Alternative term fields.
Provide singular and plural versions of the term.
8. Click Save.
9. If desired, click Download Sample CSS File to get the Salesforce style sheet.
10. Click Generate HTML.
11. Copy the resulting HTML code and click Finished.
12. Send the HTML to your website administrator to be added to your website.
